|
|
Post by 87B2XLT on Nov 30, 2006 19:20:39 GMT -5
Chuck,
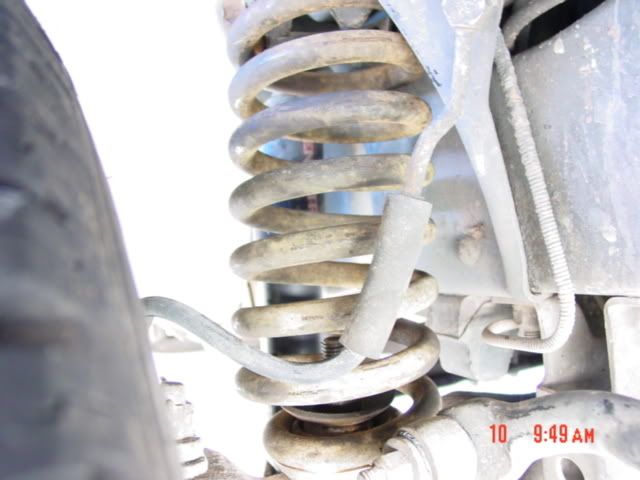
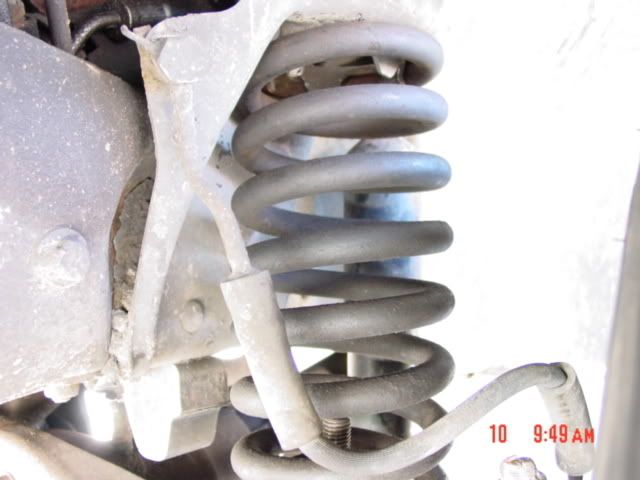
Yeah, the eventual plan is to swap in a D44 and 9" out of an EB, which are coming out of Dave Phillip's (CORE4WD) '66. Most of that wear was pre-last-alignment and quite possibly pre-drag-link-replacement by previous owner as well as pre-rotor and bearing replacment. Would not surprise me if I needed new bushings, either. I will probably incorporate that into Phase I of the project if and when I fabricate extended arms. I've seen some pretty interesting setups for the TTB, but it will only be a temporary thing but I would like to set it up so all I have to do is fab up some extended arms for the D44 and bolt-in. We'll see. I'll have to show you pictures of what I'm talking about on the top coil retainers, though (cont'd from Keith's thread unintentional hijack) ;D
|
|
|
|
Post by Chuck on Dec 1, 2006 12:01:48 GMT -5
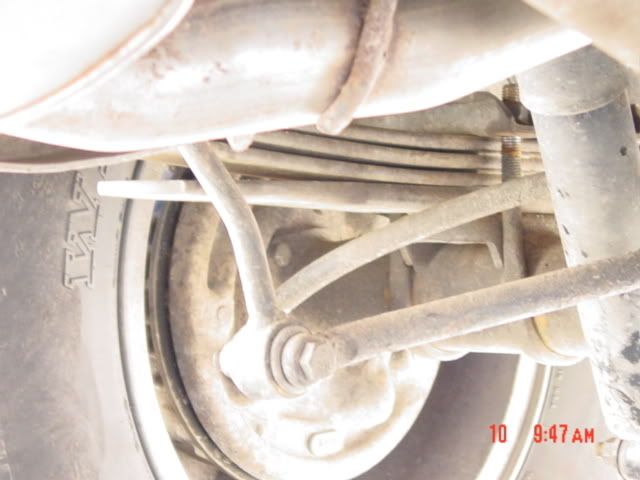
If you've replaced all the steering and still have wander, it's usually the bushings at the back of the RA's. I've done a couple of sets in the past couple years on various vehicles, including the Bronco this past year in the course of doing everything else (that was done the same time as the rest of the front axle re-sealing, pictured in that shot in Keith's thread -- I had the driver's side arm in the press to replace the TTB pivot bushing, and put a new radius arm bushing on when it went back together). They're a pain in the butt, and there are a few ways to do 'em (the way that seems almost like the hard way is best) -- but they make a big difference.
Lemme know if you want to change yours out, and I'll give ya the quick write-up on the best way. ;D
|
|
|
|
Post by 87B2XLT on Dec 1, 2006 12:33:50 GMT -5
I don't have much wander, other than when a good gust of wind darn near blows me off the road, but that's fairly normal. Not sure what all was replaced prior to my ownership, but the front end is fairly tight. If I do any modification to the TTB and/or radius arms, I'll probably need a little direction and/or help. I figure it would be best to try and box in the open side of the arms and possibly go ahead and modify / fab the transmission mount as well as extend the arms for more travel / articulation, which will be the same plans for after the D44/9" swap(s). Anyhow, off to P-n-P here shorty for some more parts procurement ;D I may consider after swapping front and rear springs to maybe do a little bit of upkeep as far as the bushings go.... I'll let you know.
|
|
|
|
Post by Chuck on Dec 1, 2006 14:44:32 GMT -5
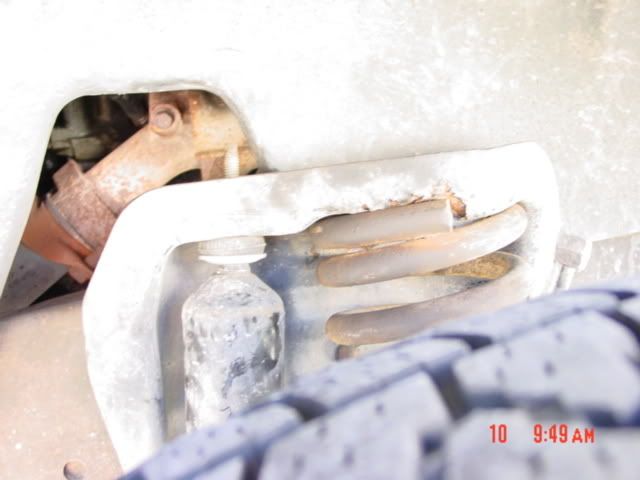
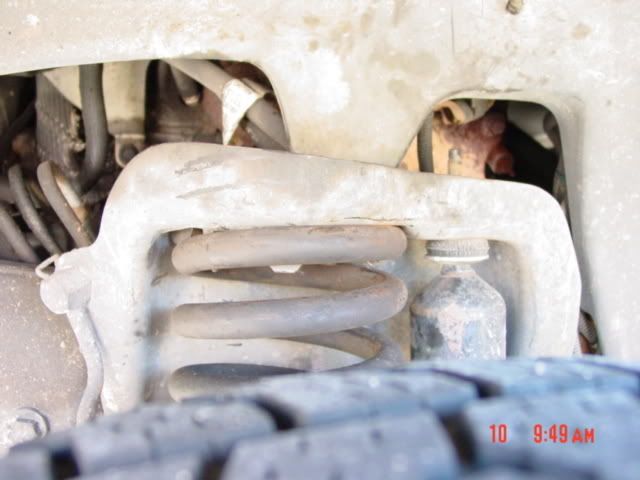
Well, if you're pulling your front coils you're usually already more than halfway from doing the RA bushings the pretty easy way. They aren't press in bushings, so all you need to do while you have the shock and coil disconnected is take the nut off the back of the RA, take the bolt out of the TTB pivot (the center pivots under the engine crossmember), and drop the end of the TTB arm 3" or so to give you enough room to move the thing forward an inch or so and get the back of the RA clear of the frame bracket. Then it's just pull old bushing off, put the new one on. I'd suggest the good poly ones, Advance sells a Moog one if I remember right ...
|
|
|
|
Post by 87B2XLT on Dec 2, 2006 9:19:16 GMT -5
Yeah, kinda figured as much. Doesn't look like I need new bushings (yet), but thanks for the tips. Anyhow, getting ready to load up and head to the Hobby Shop @ NAS Oceana. Anyone with access wanting to drop in and b.s. or help out is welcome. Going to try and git-r-done as quickly and safely as possible and maybe stop by with knife in hand to extricate the radiator I was trying to get prior to running into Keith @ P-n-P. Hopefully, I'll see whoever makes it to the party this evening ;D
|
|
|
|
Post by 87B2XLT on Dec 2, 2006 22:41:35 GMT -5
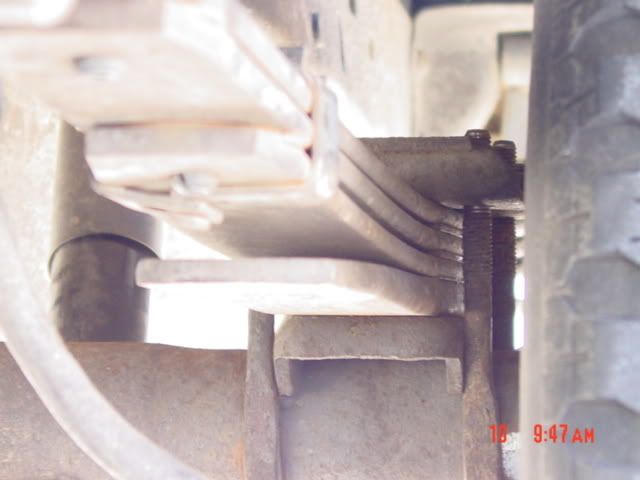
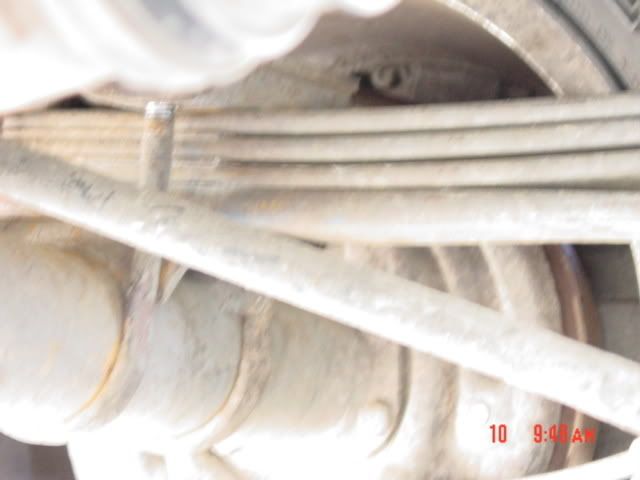
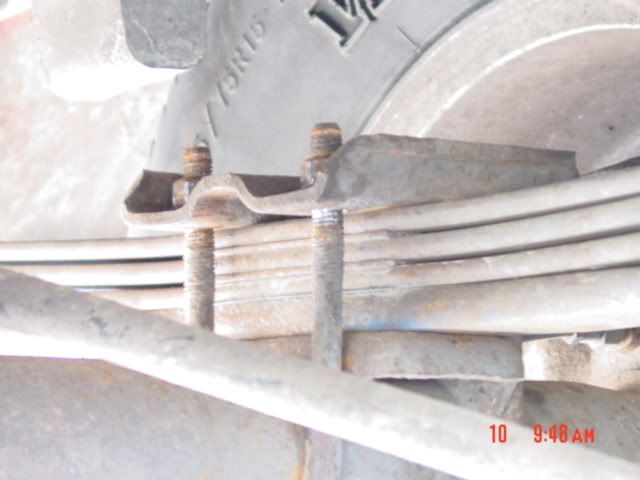
And as luck would have it..... didn't quite make the party, as posted in at least a couple of other threads. Today did finally turn out productive, though. I will take pictures Monday afternoon of the "finished product". After 9 hours of wrenching solo, numerous expletives and whatnot, got the 'xploder leafs and coils up under the thing. Initially, I thought I wasn't going to be able to do much, but after some persuasion with a 3/4" drive impact wrench, the rear bolts for the leafs came loose. THANKFULLY I had remembered to grab some spares, as two of 'em were worn pretty bad from the bushing sleeves. I did use some anti-seize upon reassembly, so, it should work a little better. Had I had a way to break the bolts at the top of the shackles, I would have lubed that up some too, will probably have to figure out something later. The front coils weren't too painful, thanks to some persuasion with a coil spring compressor and a few other handy tools. End result: Not only does it sit level, but, I got around 2" of lift out of the deal. Next up will be the wheels and tires getting swapped out (I say wheels because I highly doubt 30x9.50s will fit on my stock wheels)... which will be sometime this week. I apologize for not making the party.... I'll take my beatings later!  ;D Hope everyone had fun! |
|
|
|
Post by 87B2XLT on Dec 8, 2006 17:28:56 GMT -5
Okay, since the wheels I was going to buy... well, the guy wouldn't give me backspacing info, and I would feel more comfortable with 3.75" vice 4.5" of backspacing, I ended up ordering new black 15x8, 5 on 4.5 with 3.75" backspacing steelies from 4wheelparts.com (and now thinking I should have ordered from Summit ). So, I'll have to wait until they arrive to mount the 30s. I'll take the post-spring-swap-with-current-wheels-and-tires pic(s) tomorrow. I realized long after getting home last weekend that I mis-routed my driver's side e-brake cable, SO, I'll have to figure out the least-troublesome solution this weekend and hopefully take care of that. I do like the way she handles so far a little better, although she is a little springy. I probably will have to put different shocks on it "for now", especially if I do any radius arm modifications. That's all for now.... Dave G |
|
|
|
Post by 87B2XLT on Dec 10, 2006 21:25:50 GMT -5
|
|
|
|
Post by Chuck on Dec 11, 2006 15:36:04 GMT -5
Lookin' good! That's a lot straighter than they were.
On the lift shocks -- just remember, a 4" longer (total) shock will also be 2" longer fully compressed. Check before you spend your money to make sure that won't be long enough to bottom out the shock before your TTB arm hits the bump stop. Otherwise you might end up buckling the shaft on one of your new shocks when you hit a good bump ...
|
|
|
|
Post by 87B2XLT on Dec 11, 2006 17:36:09 GMT -5
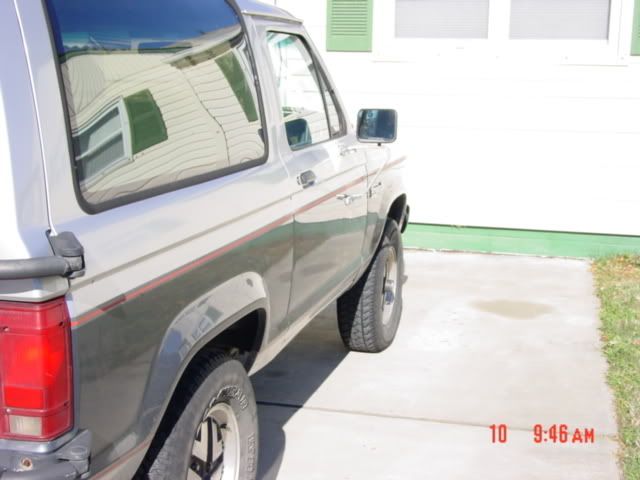
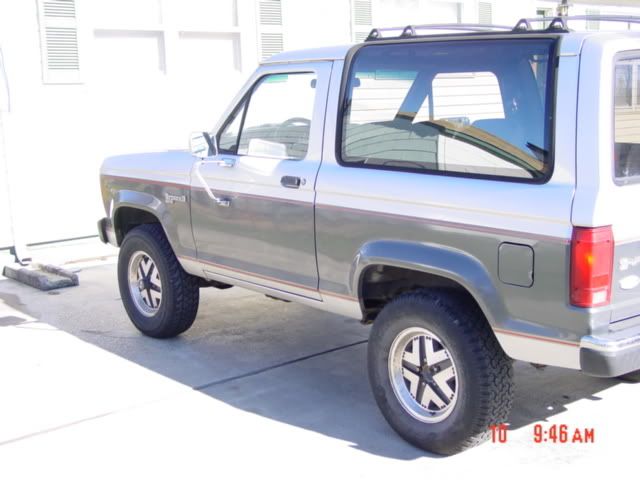
Roger, Wilco on that, Chuck! I believe the cheapest shock solution would be the Pro Comps that are supposed to fit correctly up to 2" of lift for the Ranger / BII. I'll probably do a little more research and may take all 4 shocks off and ramp it at Dave P's and take measurements. Can you see what I'm talking about as far as the camber looking slightly off, though? I mean, yeah, it's parked uphill and Ford TTBs have a tendency to want to sit heavier in the rear, I guess, but if you look at the tires and see where I drove it fairly straight up the driveway, more contact is being made on the outside of the tire width, which sort of makes me wonder if it's no more than 1 or 2 degrees off. Now, mind you, even with the "lighter" coils and worn out leafs, the camber looked about the same, as the front sat higher due to rear spring sag... and yet, the camber was not touched when I took it to a Goodyear shop (which is probably where I went wrong and payed a heck of a lot more than I should've!) when we were still in WA before the move. |
|
|
|
Post by Chuck on Dec 13, 2006 11:15:41 GMT -5
If the front's sitting a little more extended than before, it will probably be off on camber. Is your driveway level side to side? If so, you can take a simple set of measurements to figure out how much. We had to do this a few years ago on my roommate's 250, which is a leaf front TTB -- we put the HD bigh block spring packs in the front, and it raised the nose by a full inch and a quarter and threw the camber off by a good degree and a half, so I just did a quick camber measurement in the driveway and had Spring Menders de-arch the springs by the right amount to bring the camber back. Obviously this lowers the front end, but we weren't looking for lift. You can use it to figure out how far off you are so you can decide if you want to get it aligned.
Park the vehicle on a surface that's level across the vehicle, and at least close front to back.
You'll need a plumb bob or level (plumb bob's a little easier) and a tape measure or ruler (ruler works better).
Hang the plumb bob from something sturdy, as close to the wheel as you can get it but not touching. A foot away isn't a problem, just makes it a little tricker to get good measurements if you're far off. The string needs to line up with the center of the wheel, across the middle of the hub, so this is usually going to limit how close you can get on a 4WD.
Measure the distance from the top of the rim, on the lip that holds the tire bead, horizontally to the string and call that T.
Measure the same distance from the bottom of the rim and call that B.
If T is less than B, you have positive camber (the wheel is definitely leaning out).
To find out roughly how much, break out your scientific calculator or google up a trig table and take the inverse tangent of (T-B)/D, where D is the diameter of your rim, probably 15" I'm assuming. 1/16" is going to be roughly 1/4 of a degree.
Measure both sides, if the area you're on is level they'll normally be very close to the same. If they're different, doublecheck that the surface is dead level and your tire pressures are exactly the same side to side. If you can't find a dead level place to work, averaging the values from both sides will get you a rough number. In other words, if you're seeing +2* on the right and +1* on the left, your actual camber is probably +1.5* and the vehicle is leaning half a degree to the right.
Of course, they can also often actually be different, so that's a really rough measurement.
|
|
|
|
Post by 87B2XLT on Dec 13, 2006 23:17:01 GMT -5
Amazingly enough, I think someone else had mentioned a similar method when I was at the hobby shop... or it was at work or something! Good info, thanks!
I don't think my driveway here is completely level across, and I know it's slightly uphill front to rear. I'll see if I can find a good flat level spot in one of the parking lots around here or something and check it out. Once I have a rough guesstimate, I can at least pickup some new bushings and put them in and see where it sits. Thanks again, Chuck!
|
|
|
|
Post by 87B2XLT on Dec 15, 2006 15:58:09 GMT -5
Well, if all goes well, tomorrow after the cleanup at Mt. Trashmore, my stepson Chris and I will be mounting, balancing and installing the new wheels and tires. The new wheels arrived via UPS about an hour and a half ago. I thought I was going to have to stop by advance and get valve stems, but the cap & lug nut package came with them... I must've had a blonde moment when I was ordering the wheels, etc. I just know there is one lug nut on the driver's rear that is going to be a little difficult, and I am hoping it's not cross-threaded or that it doesn't snap off! Anyhow, will probably post the after-install pics tomorrow evening or Sunday. It may not have much more height even after the new tires, but, at least it'll have more trail-worthy tires on it ;D |
|
|
|
Post by 87B2XLT on Dec 16, 2006 21:33:03 GMT -5
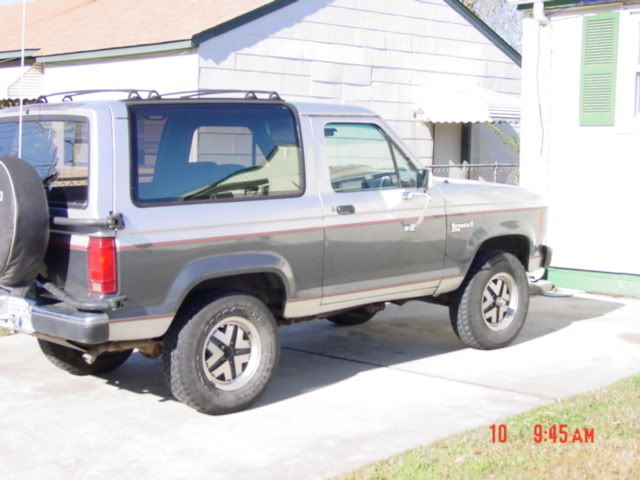
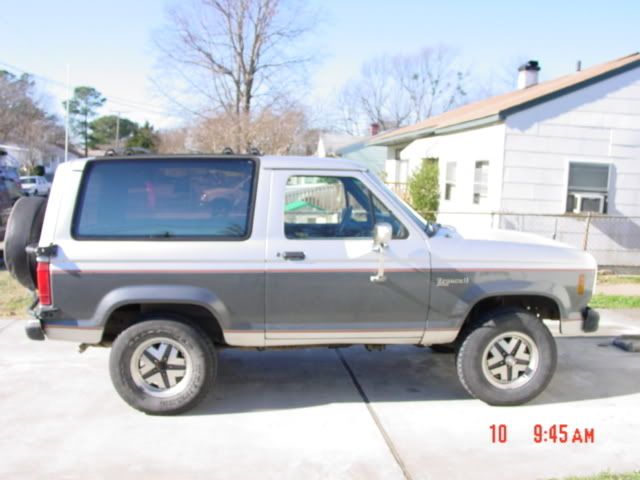
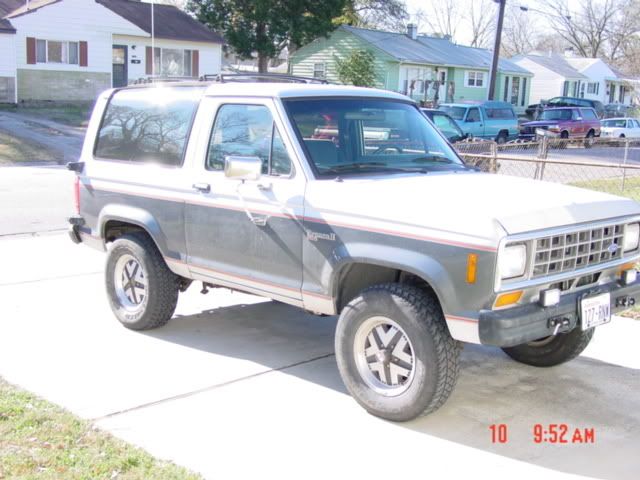
Well, unfortunately neither I nor Chris were familiar with any of the equipment other than the tire balancing machine out at the Hobby Shop, so, we ended up going to Sears and having the work done. The plus side of that is, one of the people who worked there said he might have a spare wheel that will fit that's the same size, etc., that he'll give me for $10... so, I might have to follow up on that. Anyhow, here's how she looks now: 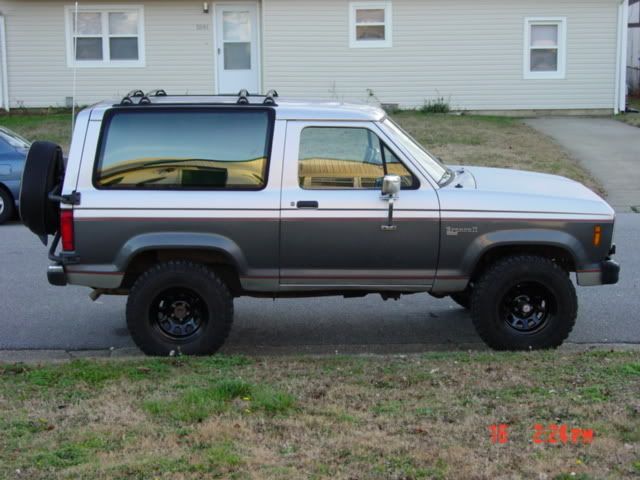  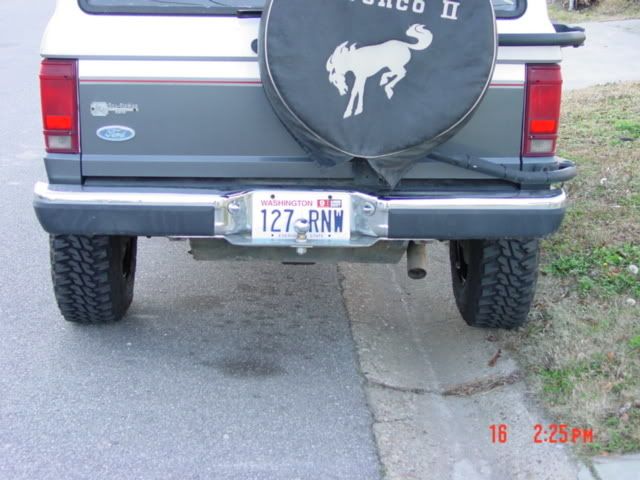 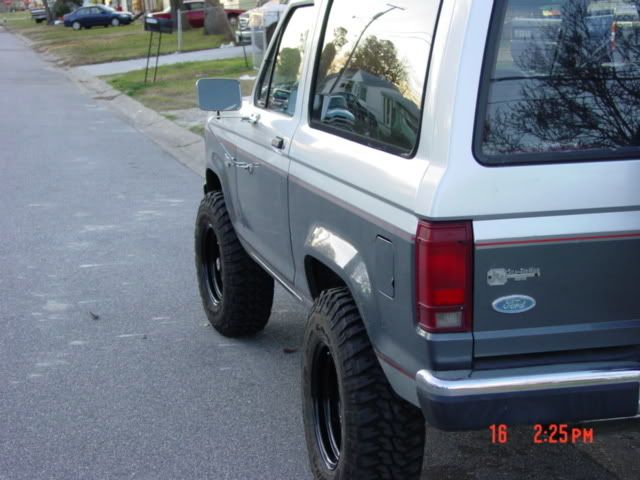 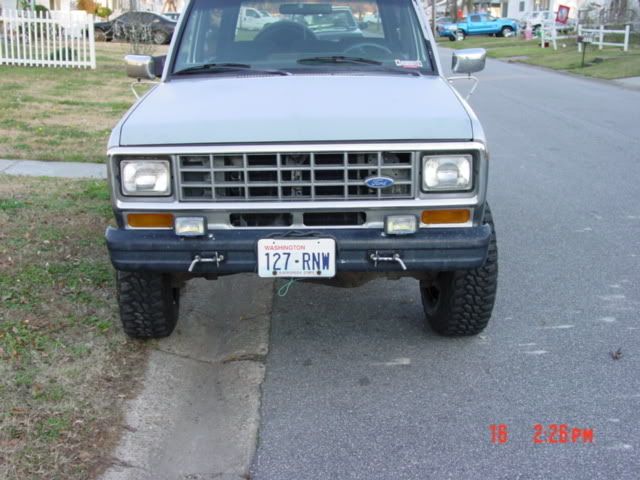 I'm thinking it might have been the way things were sitting when I backed it out of the driveway and was putting it on the street in front of the house, but I may have some rubbing issues up front, which I can fix... although, it wasn't rubbing when Andrea and I went to run some errands right after I took the pictures *shrug* All for now.... EDIT: Also, in the process of unloading the old wheels and tires and putting them in their storage location behind the house, I found where I was losing air in old the driver's front tire.... I'm guessing I ran over some sort of very thin nail or wire or something during the 2nd Mt Clean-up. At least now I can have that tire fixed! |
|
|
|
Post by Chuck on Dec 20, 2006 11:05:42 GMT -5
Hey, that looks sharp!
|
|