|
|
Post by onewyr on Jun 21, 2007 20:15:48 GMT -5
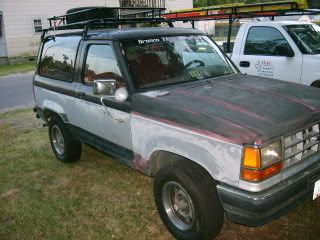
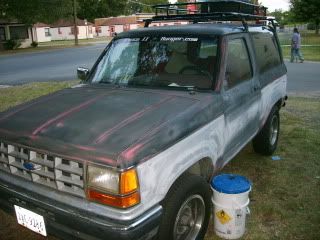
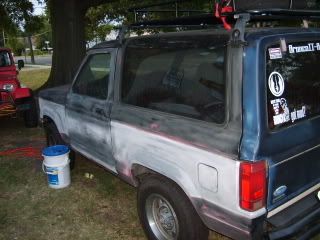
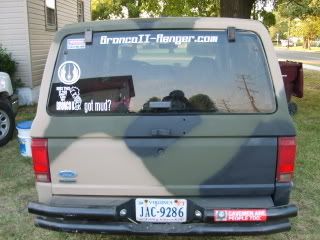
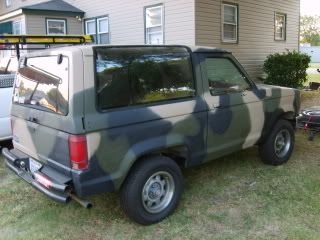
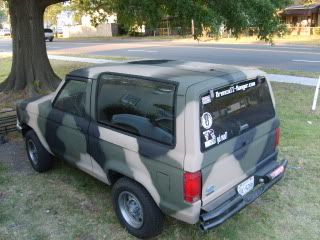
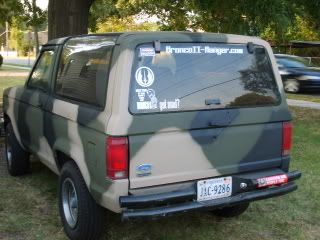
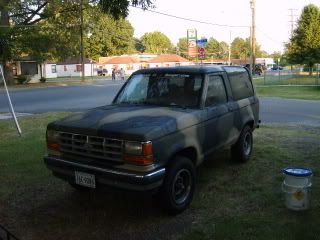
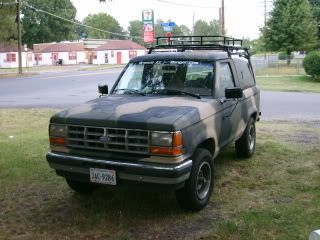
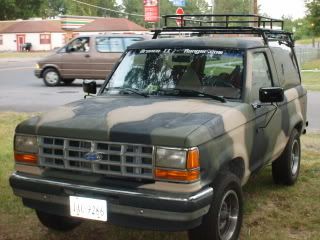
I finally took some pictures of My BII it isn't much but here is a list of what I have done so far. Carpet and center console has been removed 2.9L swapped for 2.9L minus the cracked head 58mm throttle body swap and air box removed and replaced with cone filter 2wd axles swapped out for 4wd stuff and manual transfer case installed satellite radio installed spare tire carrier installed soon to be redesigned 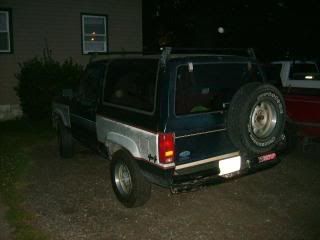 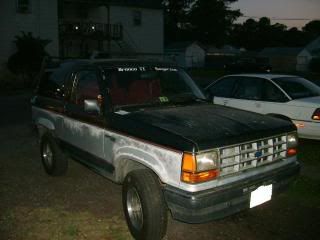 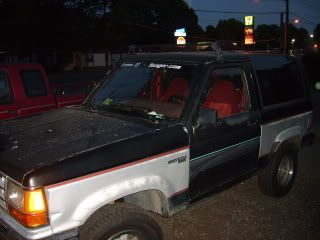 |
|
|
|
Post by 87B2XLT on Jun 22, 2007 7:35:14 GMT -5
Good starting point, Bryan. There's 4 or 5 BII owners on the ship, including me. One kid has an '89, and I think the rest of ours are all '87s. The "newest" one is an '87 Eddie Bauer edition. I've been trying to drum up some interest from them and the 'yota and Jeep owners on the ship, but the funniest response I've gotten so far is, "I don't want to have to drive too far to go off-roading".... anyhow, back to topic.... if you need help and I'm not busy, or just whatever, let me know. I recommend you KEEP the '89-'90 front clip, though... better clearance for the larger tires, and if you make a custom bumper... even better. Just my opinion.
Dave G
|
|
|
|
Post by onewyr on Jun 22, 2007 17:13:23 GMT -5
i MIGHT BE PICKING UP A 91' EXPLODER FOR 350$ AND i WILL BE STEALING THE DRIVE TRAIN OUT OF IT INCLUDING THE 4.0L. dO YOU STILL HAVE THE 2.9 AND IF SO HAVE YOU DONE THE THROTTLE BODY AND COLD AIR MOD YET.
|
|
|
|
Post by onewyr on Jun 24, 2007 19:34:16 GMT -5
This is what I worked on all saturday it works really good. thought u guys/gals might like this. Here is the color guide to the rings on the photo's. pink=pressure switch red=custom made hoses green=air/oil separator yellow=intake filter purple=inline oiler teal=factory A/C push button blue=A/C on indicator this write up is so you can use the stock A/C compressor that is on the 2.9L this may work on other models but I can not say for sure. 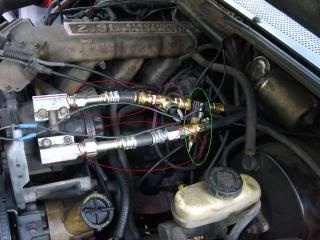 When looking at this picture the a/c pump manifold on the bottom is the intake and the a/c manifold on the top is the exhaust for the pump. lets start from the intake side. you will start with an intake filter I used I think a PCV breather for euros at advance auto. From the filter I used a 3/8 nipple to hook the filter to the oiler from the oiler I took a piece of 3/8 air hose to the hose I had made for the intake manifold. that completes the intake of the onboard air system. Now for the exhaust which is what will fill your tank. I used the other hose I had made went int a "T" fitting where the pressure switch is then I went from the "T" to the air/oil separator from the separator I took some hose all the way back to a "X" that is mounted on the tank that also holds a pressure guage and an air chuck. that pretty much completes the install. Now back to the pressure switch. This pressure switch is from an old air compressor that I had it tturns off the power to the pump when the pressure in the tank reaches 100psi, and turns it on when it drops to 80psi. I used the original button to control the main power to the compressor to maintain a factory look. in the future I will install an in dash pressure guage. most of these parts that I have used I have gathered of the last year so I can not give a cost on the entire project, here are the things I just bought. The 2 hoses I had made up cost $35, I bought 50ft of goodyear hose from Harbour freight for $18, I probably have $20 wrapped up in fittings I bought the tank from HF for I think $15 that is all I can remember right now. here are some more pics if there are any other questions feel free to ask, god knows I ask enough. 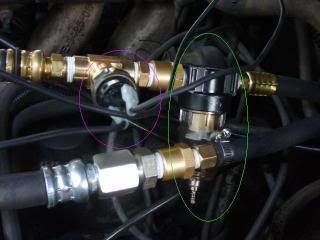 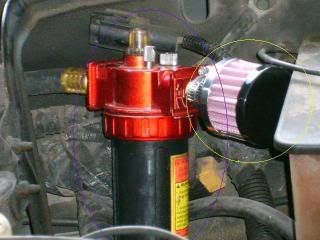 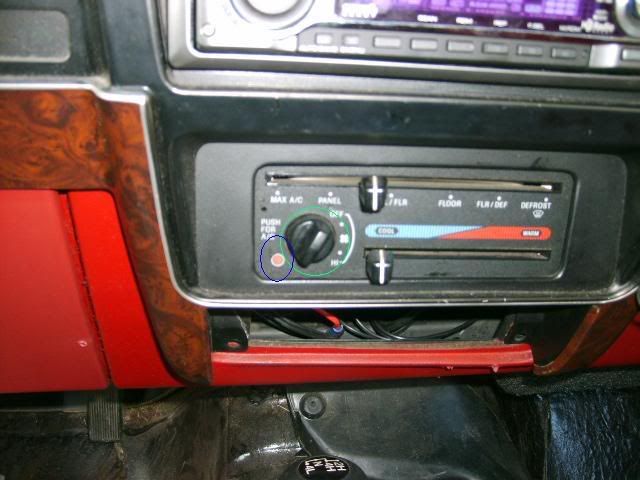 |
|
|
|
Post by onewyr on Jul 1, 2007 18:56:48 GMT -5
well this weekend has been a very productive weekend, Yesterday we went out to P-N-P where I ran into Harold who was kind enough to loan me some torx bits so I could remove a couple truck mirrors for the BII, Thanks Harold. I also pulled a skid plate for the BII because when I did the 4wd conversion I never put the skid plate in. Later I finally got around to pulling the rear driveshaft to see if it was the source of the clicking, so I pulled it and put it in 4hi and drove around the block, it was the source of the noise so I went back to P-N-P were I bought another drive shaft but instead of the GKN designed shaft I bout a double-cardan shaft which seems to be alot stronger. I went home and installed all of this stuff and the noise went away and I can finally see behind me, that was all saturday today at about 4pm I finally went out and mounted some tow hooks 1 in the front and 1 in the rear , on the recomendation of TOYNRND (spelling?). I also removed the mech. fan and installed a electric fan with thermostacically controlled switch. I even made time to install a new tensioner pully on my wifes Rodeo. how offroad worthy is a rodeo.
|
|
|
|
Post by ex-tbd85hilux on Jul 1, 2007 22:25:43 GMT -5
|
|
|
|
Post by 87B2XLT on Jul 1, 2007 22:55:01 GMT -5
I still have the 2.9 and have no plans of doing an engine swap. I haven't done the cold air mod or throttle body mod or anything, that will come later after my axle swap. Eventually, I'll rebuild the 2.9 and build in a little more go-power a la CamCraft cam and a few other things I've found info on. As far as a Rodeo or Amigo, they're fairly capable for off-road, although, I'm not a big fan of an IFS or TTB up front. I have seen people run them, but I don't know if anyone makes the high-dollar high-strength axle shafts for them, at least for the D28 / 35 / 44 TTB... then again, I haven't looked very hard, either.
|
|
|
|
Post by onewyr on Jul 2, 2007 18:52:04 GMT -5
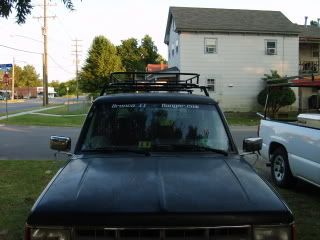
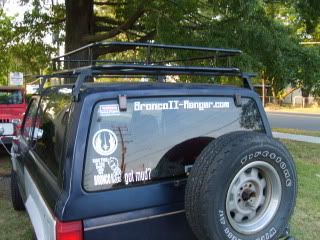
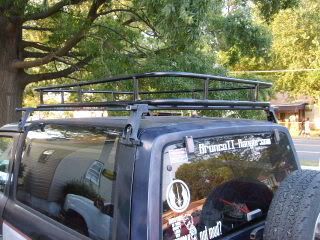
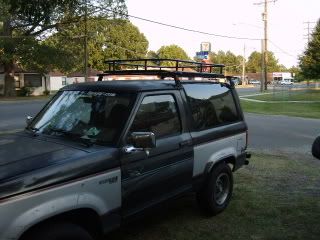
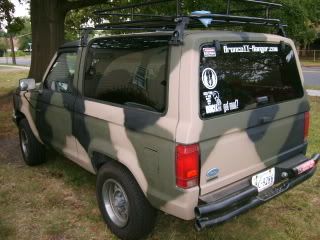
today I started working on a roof basket or safari rack for the BII today I got the bottom done still need to do some grinding but the structure is done, I will work on the rest this week. Now I think I know what you are gonna say why add weight to the top of an already top heavy truck? this is why I have a family consisting of 4 people so all seating is taken up and not much cargo room in the back so it is hard to go camping with all 4 people. It is gonna be 43"x60" it will be enough for the lighter but bigger things like tents sleeping bags and maybe folding chairs and I can put the cooler in the back. I will have pics once I get the "bubble gum" off the rack. On this rack I will also mount a high-jack, and lights maybe even a shovel. just out of curiosity what does a roof rack cost what are the cheaper prices and more expensive you have seen?
|
|
|
|
Post by onewyr on Jul 3, 2007 23:46:15 GMT -5
|
|
|
|
Post by 87B2XLT on Jul 4, 2007 10:03:30 GMT -5
That looks pretty nice... if I remove the stock roof rack I have, I may consider doing something like that. I rarely have 3 passengers in mine anymore, so I can fold down the rear seats if need be.
|
|
|
|
Post by onewyr on Jul 4, 2007 10:48:51 GMT -5
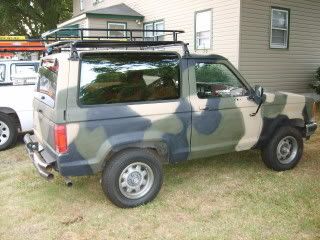
used 1 inch for the bottom and 3/4 for the top rail and vertical supports here are some pics of about 100lbs of kids sitting in it and it never flexed at all 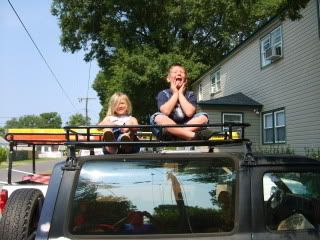 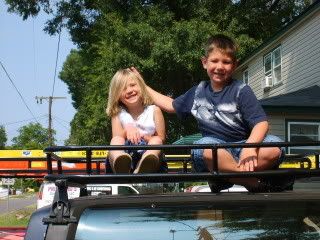 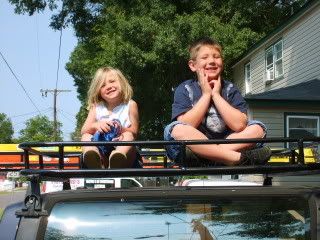 |
|
|
|
Post by onewyr on Jul 5, 2007 22:34:20 GMT -5
|
|
|
|
Post by greenbean on Jul 6, 2007 3:43:13 GMT -5
Very nice! Man I need to get a welder so I can build some more stuff for my heep!!!!! Oh the things you can do with a welder!
Will
|
|
|
|
Post by onewyr on Jul 6, 2007 19:07:53 GMT -5
|
|
|
|
Post by onewyr on Jul 7, 2007 18:47:39 GMT -5
|
|


 ;D
;D