Post by ex-tbd85hilux on Jul 14, 2008 8:33:52 GMT -5
Well I wasted no time after getting back. Already got the axle ripped out.
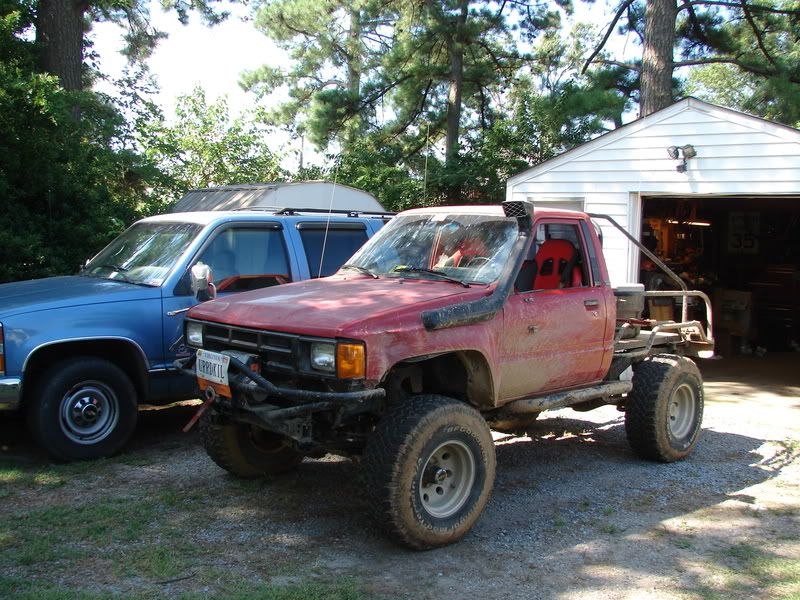
Last shot before I got the air tools and plasma cutter out
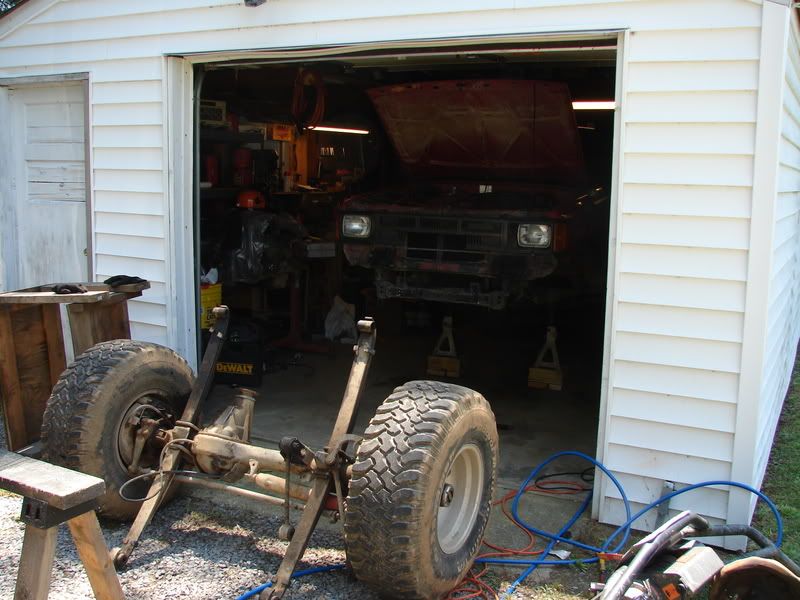
Front axle pulled
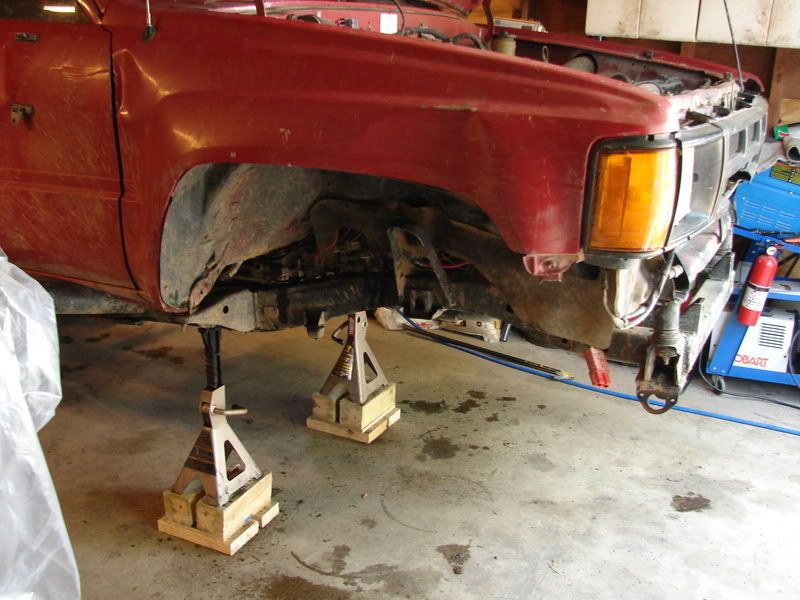
Frame before I start in with the plasma cutter
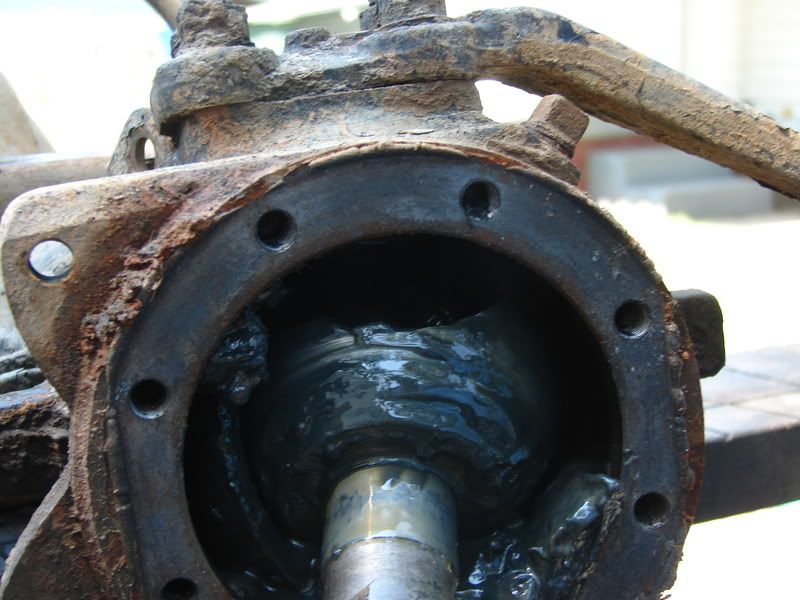
Found a small problem when I popped the passenger side spindle off
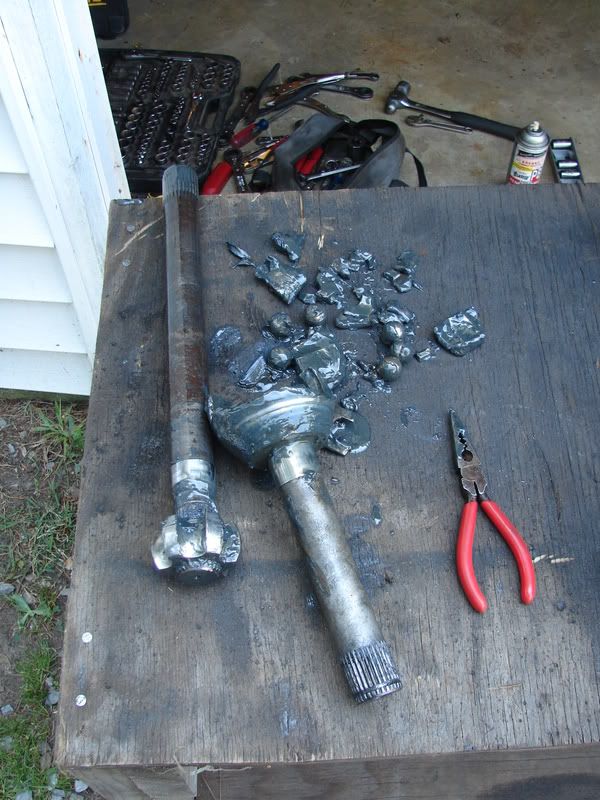
Here's all the little pieces!
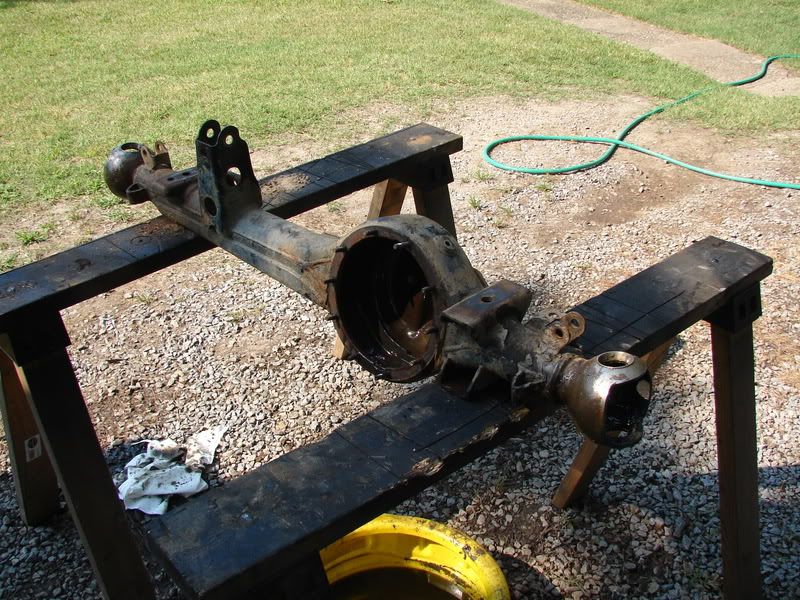
The housing stripped down of all pieces.
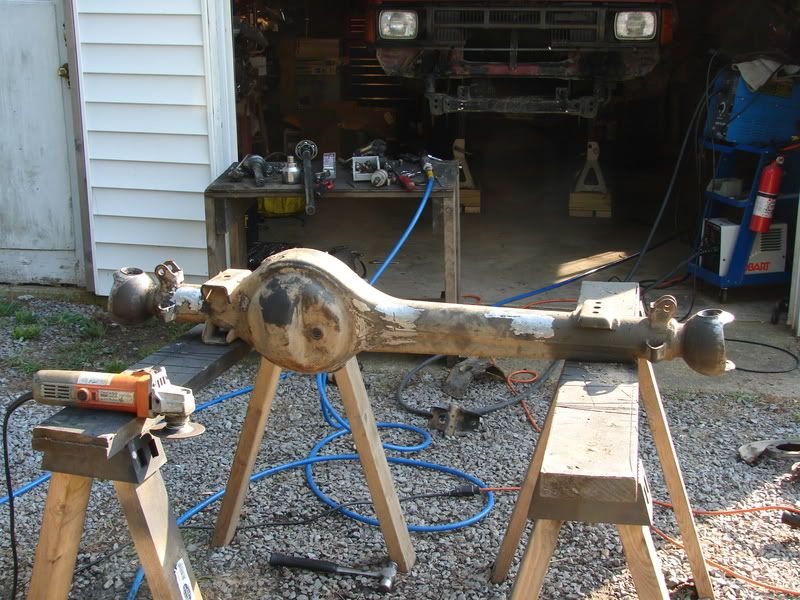
All unnecessary brackets removed like the sway bar attachments, steering stabilizer attachments, and the torque tower.
I was welding on the upper truss last night and there was a pop and the electricity stopped working in the garage so I had to stop. Found out that my welder shorted out through the lead to the axle housing which caused something to burn up in the garage electrical. I'll be going through and fixing it today so hopefully I'll be able to get back up and running later today with a new welder too!!
I'll keep you up to date with everything else that's going on and I'll post pics as I go along.
Paul G.
Added *25AUG*
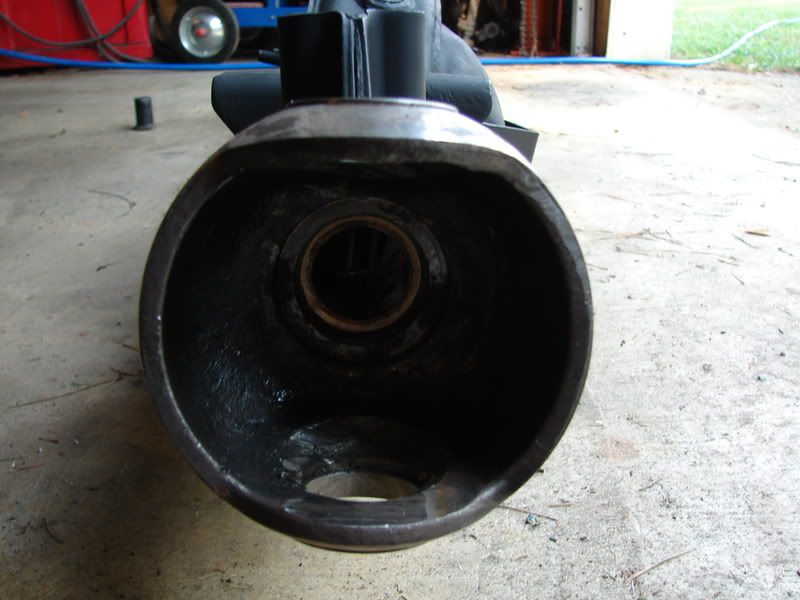
Bushing for D44 Axle conversion installed (THANKS BRYAN)
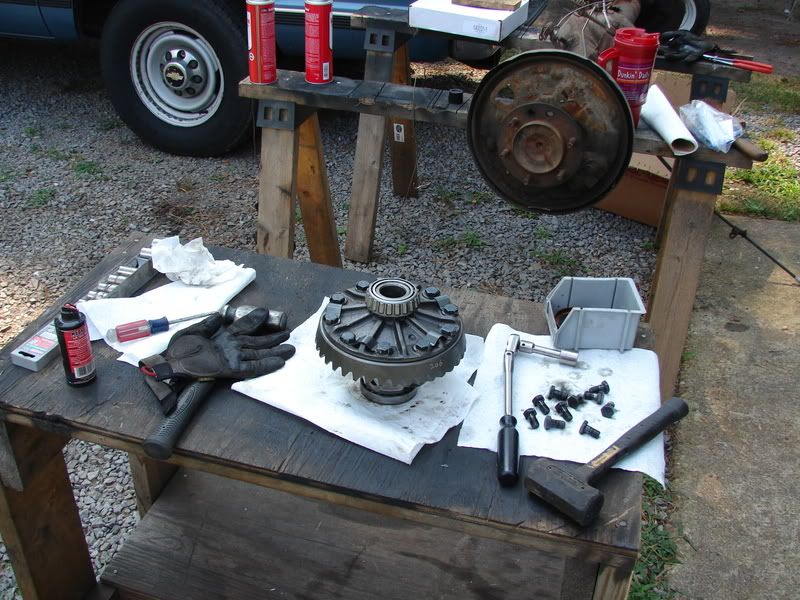
Finished setting the ring gear
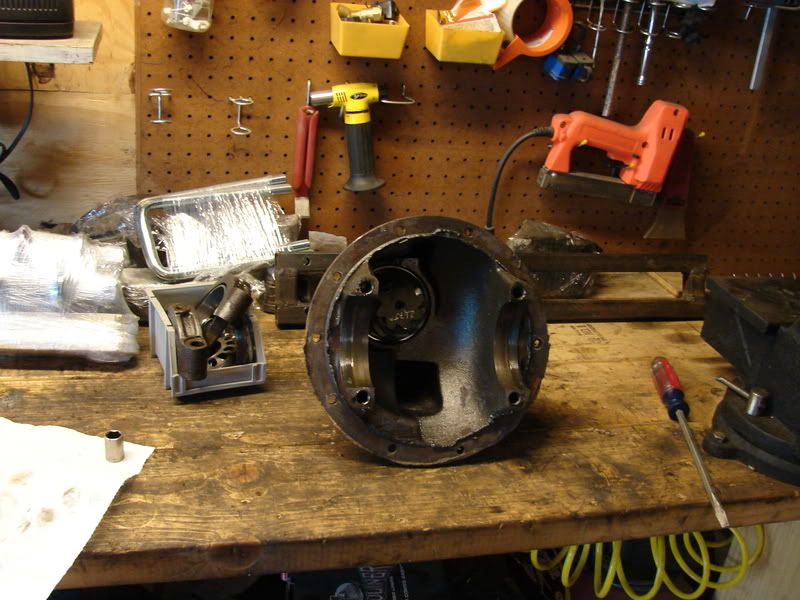
Finished the pinion install
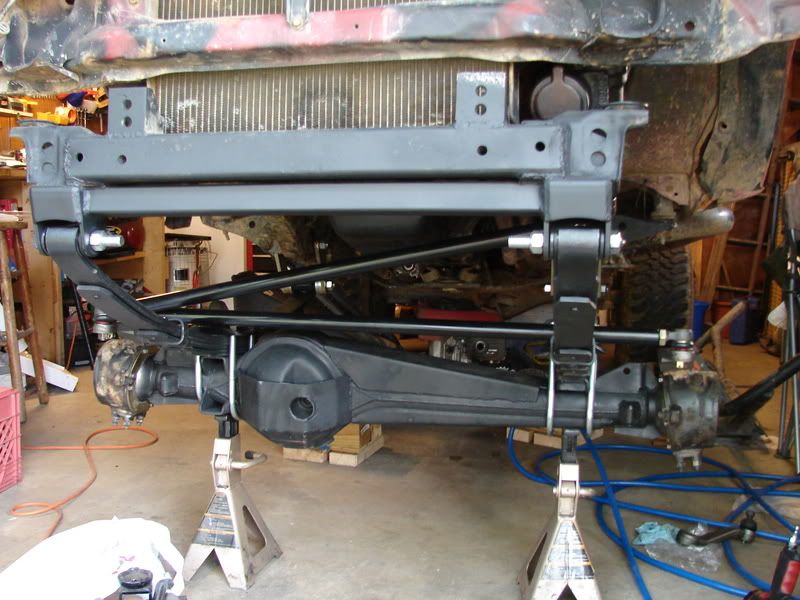
This is what it should look like but I ran into a problem... The passenger side knuckle is bent and won't allow the axle shaft to enter the housing. On my 83 axle that I had the drivers side is bent the same way. So I went and ordered a new housing from here... www.diamondaxle.com/front_steering.htm It will be about 4 weeks before it comes in but I'm having the additional axle gussets burned in and they're setting the pinion for the 3rd member 6 deg. higher to compensate for the lift and dual transfer cases. It won't be done by the annual run but I will finish this before fall.
Paul G.
**ADDED 17OCT08**
I've finally got a chance to turn a wrench (and fire up the welder) so here's the latest.
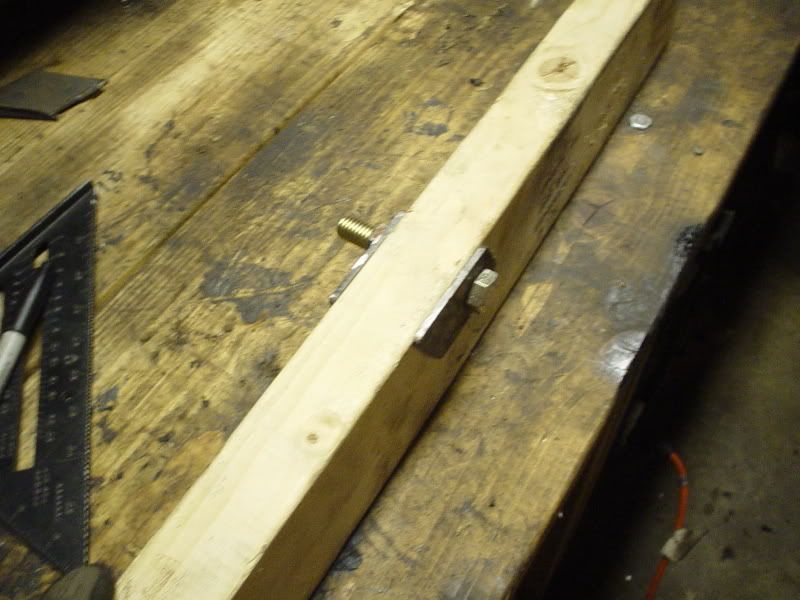
Here's how I held the two side pieces for the lower shock mounts apart so I could weld them
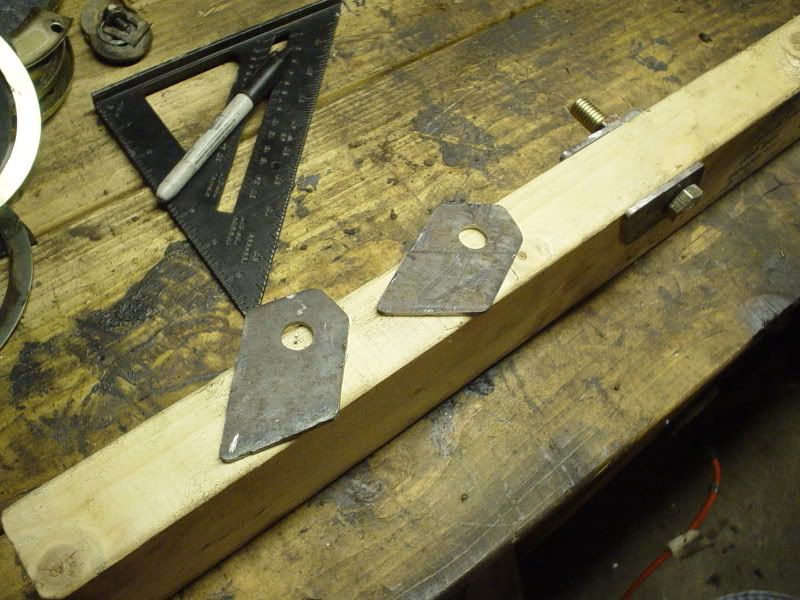
The pieces I used to make the shock mounts
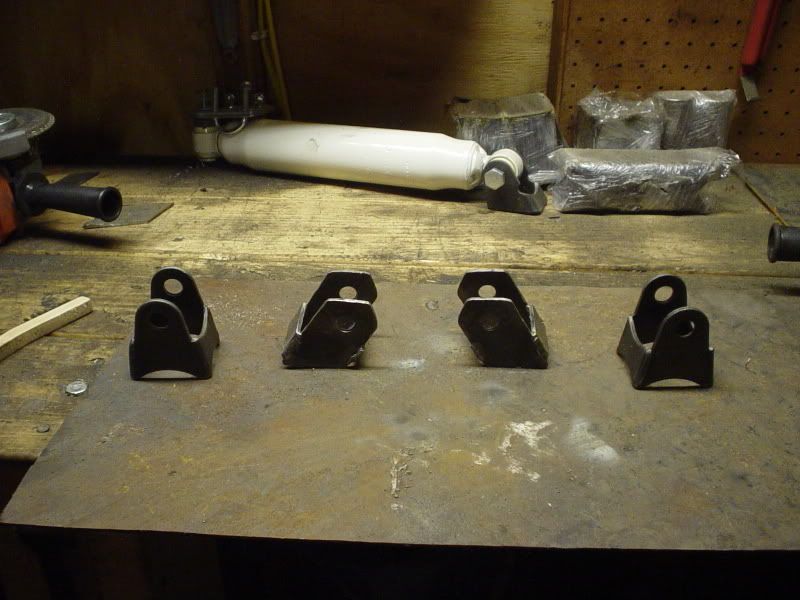
The center set are the one's I made. The outside set are the one's that came with the kit.
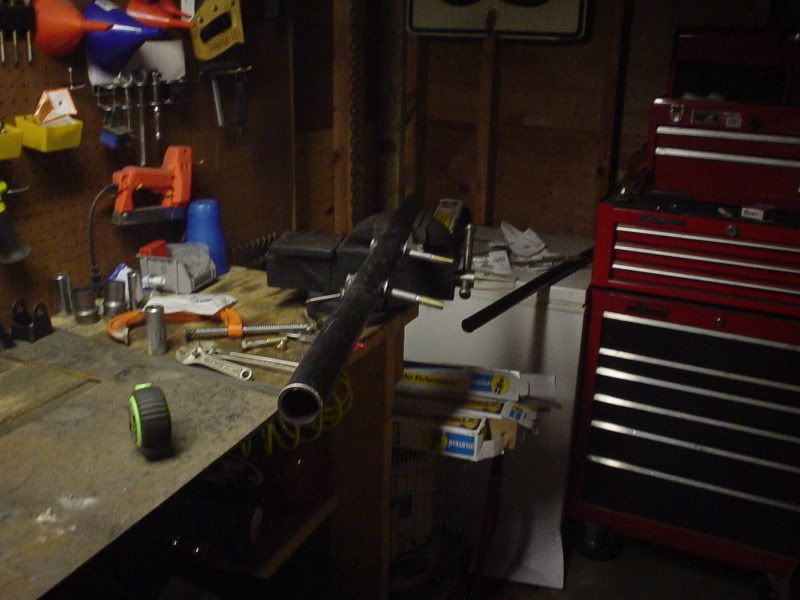
The upper shock mount before it was welded into the frame.
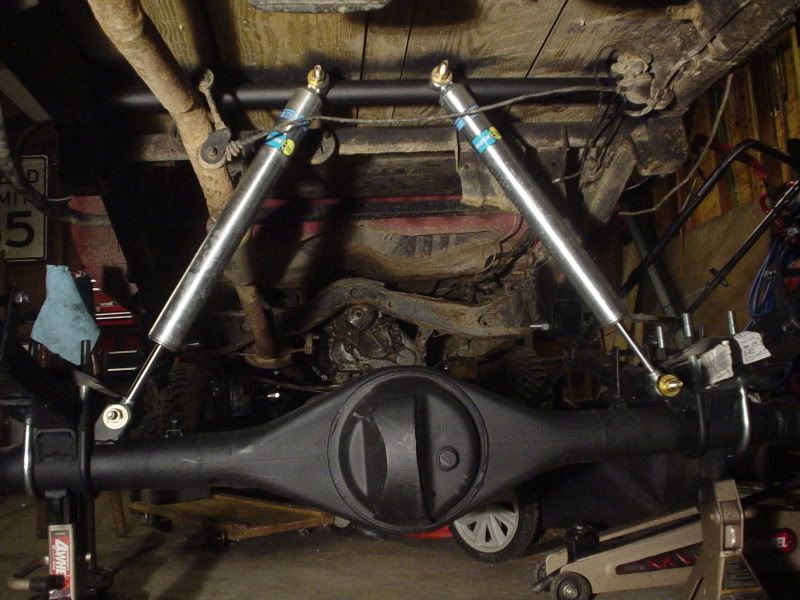
The final setup in the rear.
Tomorrow I'm going to try and build a new cross member so I can cut out the horse collar and run a double cardan joint on the rear of the transfer case. If I can get that done I'm going to try and setup the rear gears also. I'll keep it posted.
Paul G.
***Added 18OCT08***
Well I got a little more done today. Didn't get the gears setup but I did get my new cross member built and installed. I also got my transfer case e-brake installed. Tomorrow I'll set up the gears and try to get most of the rear axle put back together.
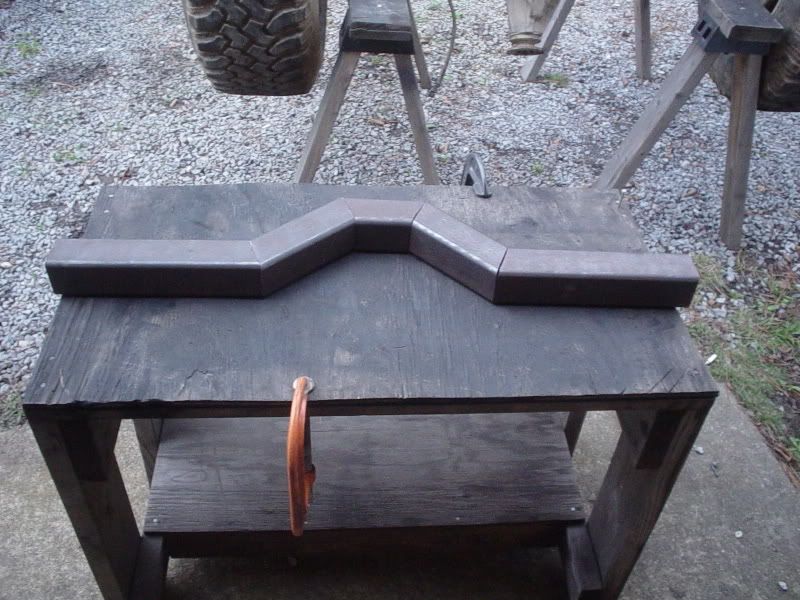
took some 2x2 square stock I had lying around and the chop saw to make the cross member. Here's laying it out ready for welding.
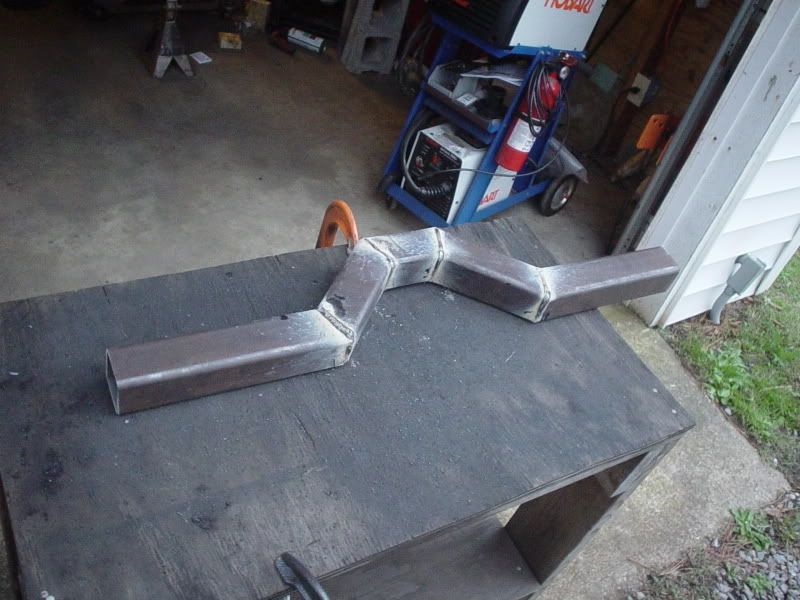
Welded up!
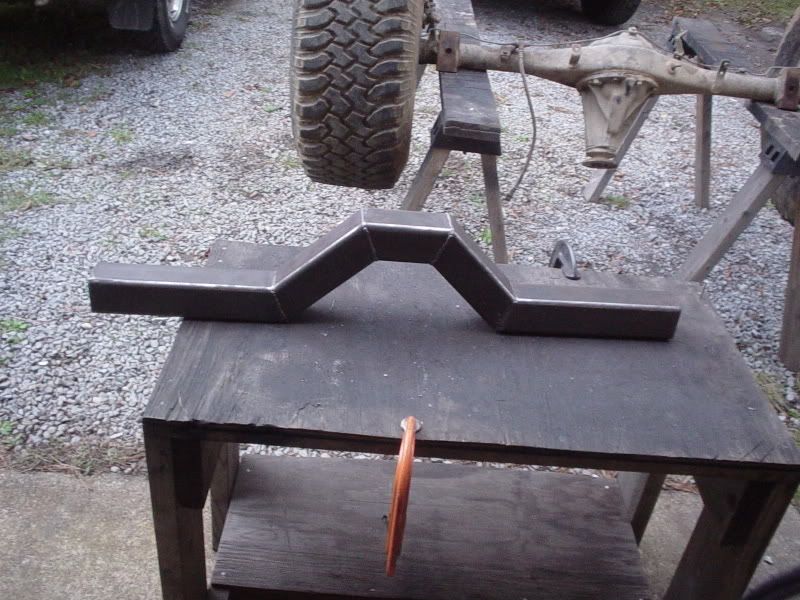
Cleaned ready to install
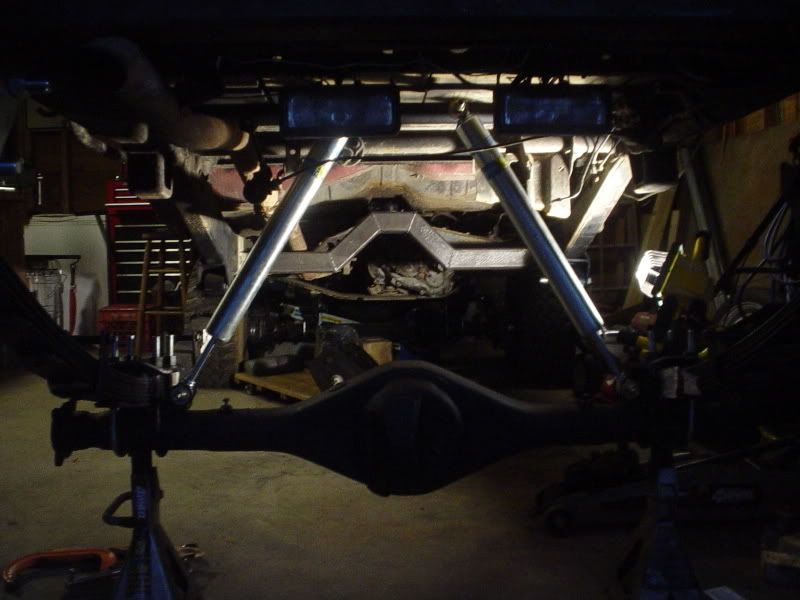
There's how it sits. I'll go back when I redo the bed and add some additional support to it to go all the way to the top of the frame. But that will do for now.
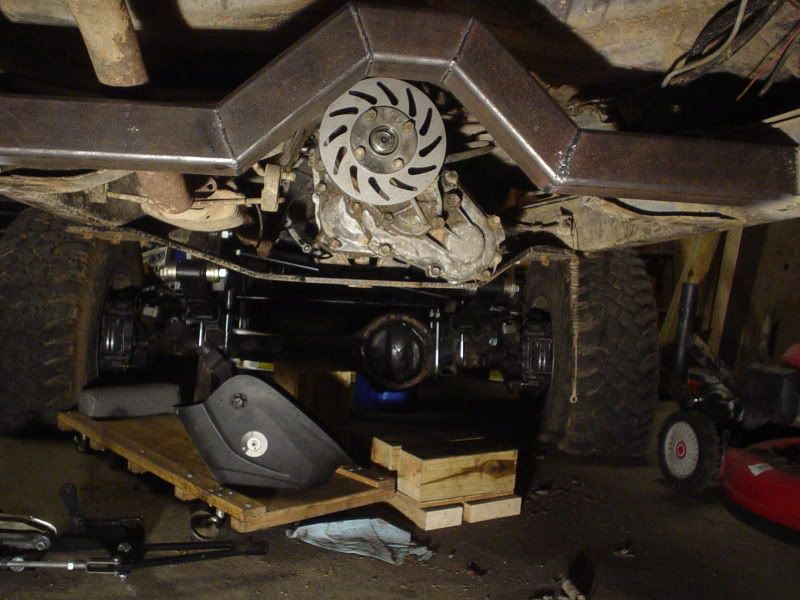
The Transfer case Disk for the E-brake
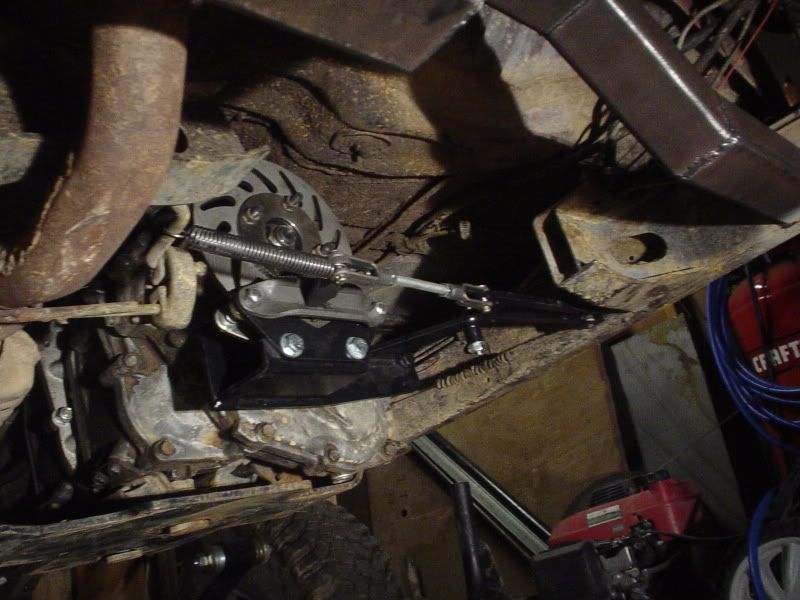
The e-brake installed. I need to get a new cable cause mine is worn and binding but otherwise it should hold me on a 45 deg slope.
Paul G.
**added 2NOV08**
I finally got Ol' Red out of the garage last night. I still need to get a new proportioning valve for the rear to adjust the disk brakes and I need to drop the body lift so that I can fit it in and out of my garage without running the tires flat. I'm still waiting for the front axle housing to come in from diamond axle so I'll start working the body lift today. Here's the pics I've clicked since the last time You saw it.
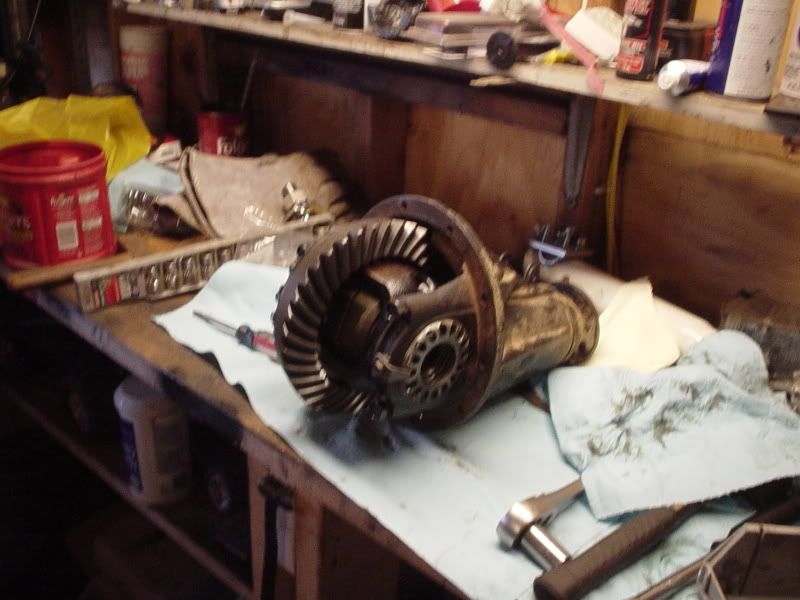
The rear gears set up.
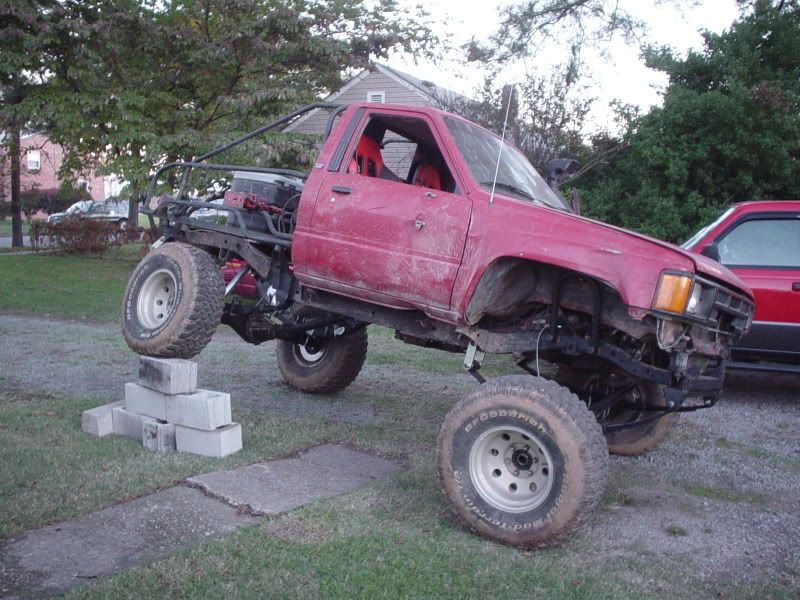
My makeshift RTI ramp.
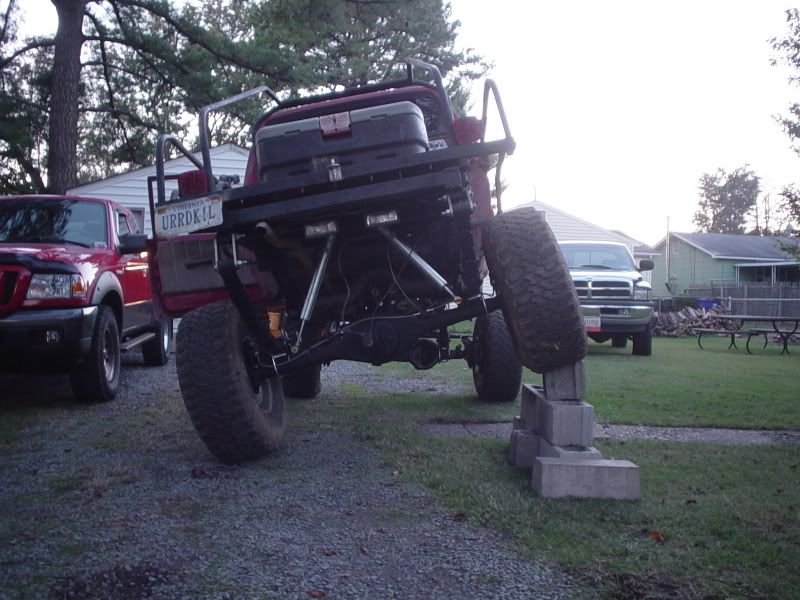
a second shot of the truck flexing.
I'll also be making some new rock rails as soon as the body lift is off and doing some further undercarriage changes.
Paul G.
**added 30Nov**
Just got back off vacation friday so I started work again. Here's a couple shots of the new axle vs. the old axle.
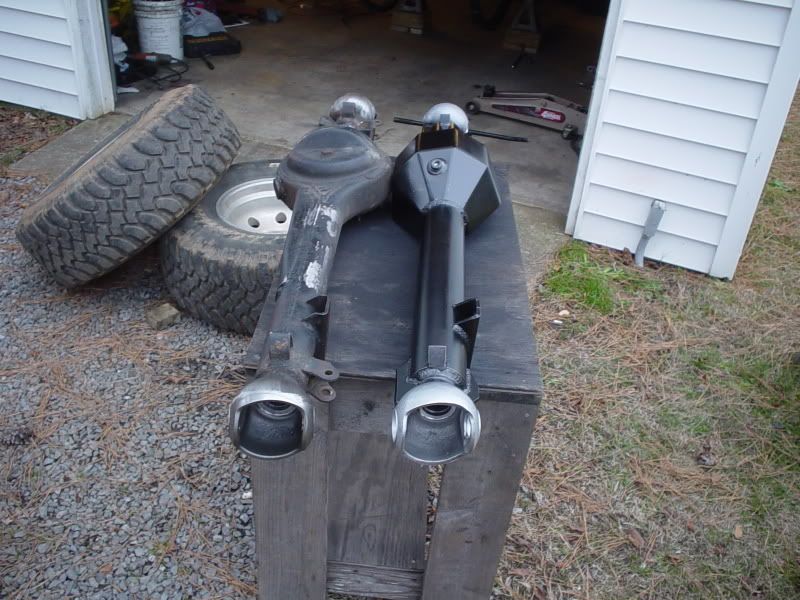
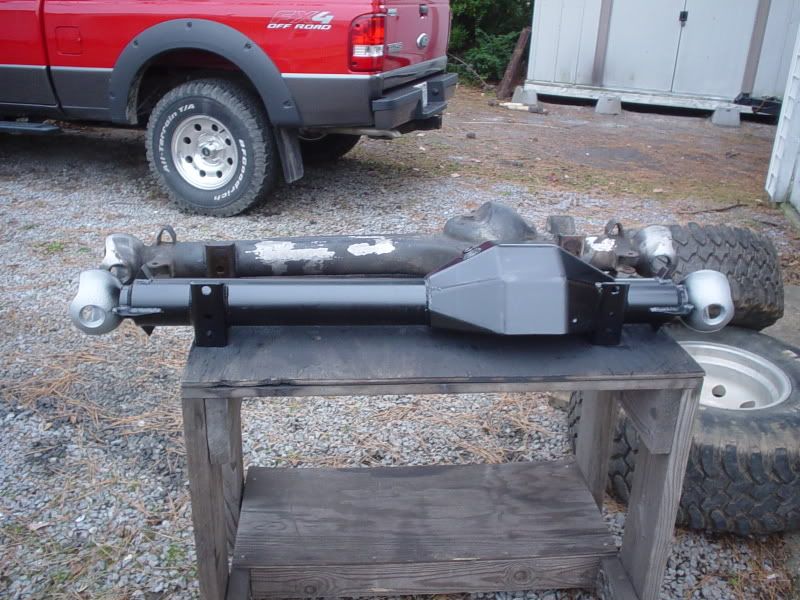
I've had to get creative with the mounting of the u-bolts. The passenger side inside perch is integrated into the housing so I'm having to make some bracketry to mount the spring plate. I also have to finalize the shock mounts too. Hopefully later today I'll have the final welds burned for the spring plate mount. (gotta get a couple grade 8 bolts) and then it will be just a matter of bolting everything back together. I'll keep posting as I make progress.
Paul G.

Last shot before I got the air tools and plasma cutter out

Front axle pulled

Frame before I start in with the plasma cutter

Found a small problem when I popped the passenger side spindle off

Here's all the little pieces!

The housing stripped down of all pieces.

All unnecessary brackets removed like the sway bar attachments, steering stabilizer attachments, and the torque tower.
I was welding on the upper truss last night and there was a pop and the electricity stopped working in the garage so I had to stop. Found out that my welder shorted out through the lead to the axle housing which caused something to burn up in the garage electrical. I'll be going through and fixing it today so hopefully I'll be able to get back up and running later today with a new welder too!!
I'll keep you up to date with everything else that's going on and I'll post pics as I go along.
Paul G.
Added *25AUG*

Bushing for D44 Axle conversion installed (THANKS BRYAN)

Finished setting the ring gear

Finished the pinion install

This is what it should look like but I ran into a problem... The passenger side knuckle is bent and won't allow the axle shaft to enter the housing. On my 83 axle that I had the drivers side is bent the same way. So I went and ordered a new housing from here... www.diamondaxle.com/front_steering.htm It will be about 4 weeks before it comes in but I'm having the additional axle gussets burned in and they're setting the pinion for the 3rd member 6 deg. higher to compensate for the lift and dual transfer cases. It won't be done by the annual run but I will finish this before fall.
Paul G.
**ADDED 17OCT08**
I've finally got a chance to turn a wrench (and fire up the welder) so here's the latest.

Here's how I held the two side pieces for the lower shock mounts apart so I could weld them

The pieces I used to make the shock mounts

The center set are the one's I made. The outside set are the one's that came with the kit.

The upper shock mount before it was welded into the frame.

The final setup in the rear.
Tomorrow I'm going to try and build a new cross member so I can cut out the horse collar and run a double cardan joint on the rear of the transfer case. If I can get that done I'm going to try and setup the rear gears also. I'll keep it posted.
Paul G.
***Added 18OCT08***
Well I got a little more done today. Didn't get the gears setup but I did get my new cross member built and installed. I also got my transfer case e-brake installed. Tomorrow I'll set up the gears and try to get most of the rear axle put back together.

took some 2x2 square stock I had lying around and the chop saw to make the cross member. Here's laying it out ready for welding.

Welded up!

Cleaned ready to install

There's how it sits. I'll go back when I redo the bed and add some additional support to it to go all the way to the top of the frame. But that will do for now.

The Transfer case Disk for the E-brake

The e-brake installed. I need to get a new cable cause mine is worn and binding but otherwise it should hold me on a 45 deg slope.
Paul G.
**added 2NOV08**
I finally got Ol' Red out of the garage last night. I still need to get a new proportioning valve for the rear to adjust the disk brakes and I need to drop the body lift so that I can fit it in and out of my garage without running the tires flat. I'm still waiting for the front axle housing to come in from diamond axle so I'll start working the body lift today. Here's the pics I've clicked since the last time You saw it.

The rear gears set up.

My makeshift RTI ramp.

a second shot of the truck flexing.
I'll also be making some new rock rails as soon as the body lift is off and doing some further undercarriage changes.
Paul G.
**added 30Nov**
Just got back off vacation friday so I started work again. Here's a couple shots of the new axle vs. the old axle.


I've had to get creative with the mounting of the u-bolts. The passenger side inside perch is integrated into the housing so I'm having to make some bracketry to mount the spring plate. I also have to finalize the shock mounts too. Hopefully later today I'll have the final welds burned for the spring plate mount. (gotta get a couple grade 8 bolts) and then it will be just a matter of bolting everything back together. I'll keep posting as I make progress.
Paul G.
